Slow blog updates! But it is the start of the holidays so that is to be expected. But the boat is still on track. Over thanksgiving I went out and visited family taking my first mate along and we had a grand time tramping around the south west United States. Once I got back I glued up my centerboard and filled the pivot and rope attachment point with epoxy. Very simple.
Next I turned my attention to the final details of the keel. I made sure the bottom was nice and flat all the way across with my trusty plane and sander. I had to adjust the pivot hole in the keel as I messed up the alignment a bit.
I also had to dig out a 1/2 inch of wood from the vertical support in the aft section of the keel. I thought no big deal go buy a chisel and a couple bangs later I would be done. HA! I got about 3 wacks in and tore a chunk out of the support. At the time I thought I made a massive error and felt like a fool. But after looking at the triangle shape of busted wood I got some thickened epoxy and a clamp and glued it right back.
Then it was off to youtube to learn how to actually chisel something. After 24 hours the chuck was cured I took my hand saw and cut a bunch of 1/2 inch deep cuts into the top, then using the chisel tapped gently to make a grid on the top of the wood. Then on the side tapped into the wood. It was quick and easy work, I used sandpaper and my rasp to get the rest out.
Once that was complete I made the aft keel cap, that will seal the entire rear section. I was going to use my table saw and jig again but this time I made a quick drawing on a piece of spruce that I cut down to be a 1/2 inch thick and used the band saw to bring close to the line. Then with my plane I slowly shaped it to fit. I left it a tiny bit out of spec which I will clean up once the lead is done pouring next weekend. Now I had to find a propane tank (easy), something to melt lead in then pour directly from that or scope it out. I think I will just pour it out as the holes are pretty large.
I'm enjoying the build it really cleans my soul and cheers me up, but I am excited at the prospect of silence and tapping rigging. Chapter one should be complete next weekend.
 |
| Aft keel Cap |
 |
| Gluing the centerboard together |
 |
| Centerboard all my clamps and everything that was heavy |
 |
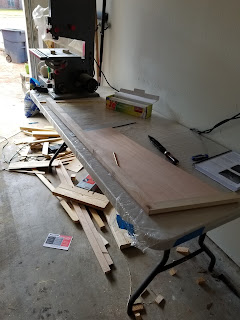
| Keel is looking nice, wood shavings everywhere |
 |
| Keel is nice and straight |
 |
| Nice and flat |
 |
| The top board hole was off! |


Comments
Post a Comment